BRINGING BACK AUGUSTUS FROM THE DEAD!
Good old Gus….a violin born in Germany circa 1850 (the same year and country as the premier of Wagner’s “Lohengrin”), eventually brought to the United States by an unknown owner, but soon vanishing circa 1938, lost and presumed dead. But in 1992, Gus was accidently found and exhumed from oblivion, brought back to life, albeit in a weakened condition.
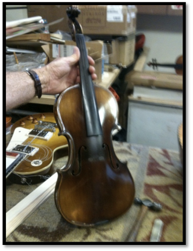
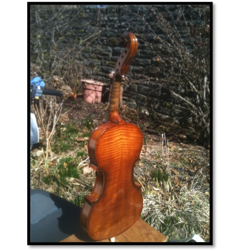
Like the early television hero, the million dollar man, Gus was later completely restored to a magnificent and much improved new life in a restoration project beginning in December 2011 and culminating this week. The resurrected, exceptionally handsome “Augustus” will be played for the first time in his new life on Thursday, March 8, 2012 in the workshop of Harold Golden, Golden Violins, in Chestnut Hill, PA. What follows is Gus’ life story.
The name of the original luthier is unknown, as there is no identifying label inside the instrument, but its characteristics and style indicate an approximate age of 160 years. All respectable instruments are named, e.g. Gus’ brothers and sisters on my mantel who have all been built or restored by me, Rebecca, Edward, and Wilhelm. I chose the name Augustus because of the obvious Germanic feel of the name, but also because Gus was the clandestine nickname the working men gave to my landscaping boss, Lee Augustus St. Clair Garland, who meant so much to me in my high school years. I have always wanted to honor him in some way.
Mystery surrounds Gus. When I came to Abington Presbyterian Church as Director of Music in 1991, there was no music library or organist’s office, but there was an old storage room that no one seemed to have cleaned out in decades. What was stored in that room was largely outdated and unwanted, so most of it was thrown out in order to turn the room into a choral library and organist’s office. In the midst of the cleaning process, I found in the shadows of a dark corner a box covered with many years of dust. Inside was brand-new sheet music, but the newest publisher dates on that music was 1938, a really old box of music! The surprise lay underneath the music. At the bottom of the box were various pieces of what seemed to be a complete violin. My first thought was to throw them out, but on second thought, I took the pieces to a Zapf’s Music Store to see if it could be glued back it together. The man who waited on me then is now my longtime friend and luthier mentor, Harold Golden of Golden Violins. He put it back together, threw in a cheap bow and case, and charged me only $60. That was March 1992, Gus’ first attempt at resurrection!
About seven years later when I started teaching at Germantown Academy as both choral director and string orchestra director, Gus was became the emergency instrument for students who forgot their violins. Although cosmetically ugly, Gus had a sturdy sound that projected well, but also a sound void of the richness referred to by Muti as “velluto” (velvet sound).
Now, fifteen years later and in my first year of retirement from full time school teaching, and having completed five other luthier projects, I needed a new venture. Harold and I decided to see what would happen if we completely restored Gus. The new restoration began in December, 2011 and took three months, usually working one or two days a week.
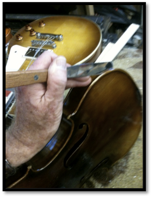
The history and health of a violin can only be gauged from studying the inside of the two plates, the back and front of the instrument, so the first thing we needed to do in plotting the restoration was to completely disassemble the instrument.
The original luthier had obviously been in too much of a hurry. A good luthier makes the inside of an instrument as beautiful in appearance as the outside, both because the sound waves move more freely and because they know that someday, in perhaps a hundred years, some future luthier will disassemble this violin and judge the quality of his own work by the beauty and flawlessness of the inside. So it was time for us to disassemble Gus and see its history and what restoration procedures needed to be followed.
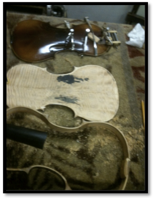
The good news was that Gus had been made from good wood, although the workmanship was a quick job without much finesse. Building a violin can only be done by hand using hand tools, almost the same as Stradivari (his real name…the “us” was added much later thinking it would add prestige to the name). Thinning the upper and lower plates (officially called regraduating) for maximum capacity to vibrate is perhaps the most time consuming part of the restoration process. It is accomplished with tiny finger planes and requires many days of tedious labor. Therefore throughout history, luthiers interested in building and selling large quantities of violins would just do enough graduating to get by. As a result, Gus’ plates were twice as thick as they should be to create maximum richness and fullness of sound.
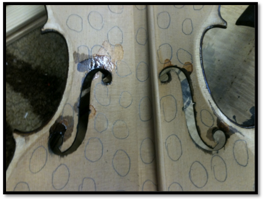
The original varnishing job, probably 160 years ago, had been hurried and sloppy. Note the excess varnish that had leaked into the F holes on the top plates and also the strange black tar or acid stains on the back plate.
But those are simply cosmetic concerns. The most significant issue of this type of restoration is the thickness of the top and back plates. The first step toward regraduating the plates is to draw circles on the insides of both plates every 2 square inches. Then a caliper is used to measure the exact thickness at each circle.
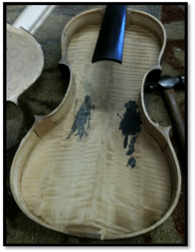
The original thicknesses averaged 5 to 6 millimeters, significantly limiting the natural ability of the violin to vibrate and create sound. My first job was to spend three days thinning the top plate (spruce for better vibration) to exactly 2.5 millimeters, using finger planes less than one inch long.
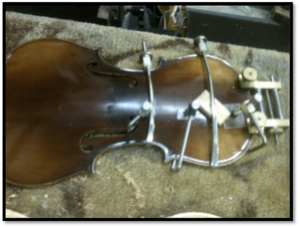
Once the thickness was a consistent 2.5 millimeters, I then used a curved steel scraper to totally smooth the inside surface. That inside curvature needs to be as smooth as a baby’s bottom, allowing the sound to roll throughout the instrument unimpeded. As careful as I was, the thinning job on the top plate ran into a serious problem that I had managed to avoid in my other restorations. Gus’ wood was more brittle with age than I knew. I pushed a little too hard on the top plate with the finger plain, and the top plate snapped, almost splitting right down the middle. I panicked, thinking the project was ruined, but Harold as usual came to the rescue, perfectly re-gluing the dangerous split using animal hide glue and various unique clamps.
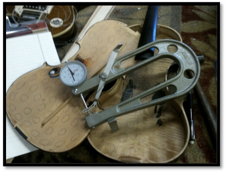
Then the same process of tedious and now more cautious regraduating needed to be accomplished on the back plate. The back plate is, however, much different in many ways. The wood is maple instead of spruce. Maple is far denser and is used for the back plate as an acoustical shell to shoot the sound that is created by the less dense top plate spruce back out the F holes above. But Stradivari discovered that the graduation needs are different between the top and back plates. Because the center of the back plate needs to be the source of shooting the sound back up, Stradivari allowed the center of the plate to be up to 5 mm thick, graduating down to 2.5 mm on the all the outside edges. The feel of carving on the two different kinds of wood is quite different, and one needs to adjust the weight pushing into the wood and the speed of the stroke.
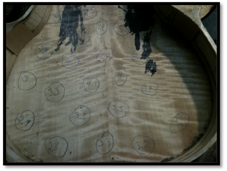
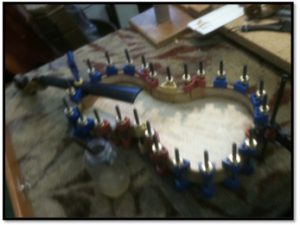
Once both plates were adequately thinned and the insides perfectly smoothed with no rough edges, it was time to re-glue the top and back plates to the garland, the term used for the sides of the violin. The back plate is always glued first, being the simpler of the two because of the added complications of the top plate needing to work around the fingerboard and neck. Once glued, the back plate needs to dry overnight, and then the top plate is glued the next day. In the disassembling process, the fingerboard, neck, and scroll remain attached to the garland. They are rarely detached in a restoration unless there are specific related concerns.
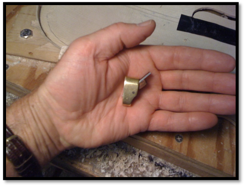
Later in the restoration process, we encountered continuing concerns with the glued components not holding consistently. We had to re-glue certain seams on three different occasions. Harold sensed that the problem had something to do with the original glue used back in 1850.
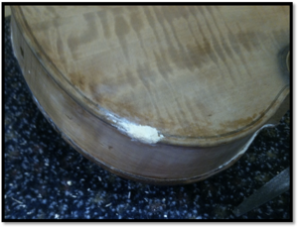
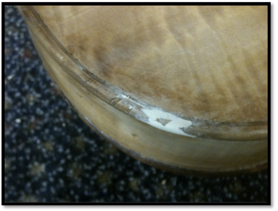
At some point in his life, Gus had obviously been neglected and abused, because there were several chips and gouges missing from the wood around the lip, the outside edge just outside the purfling (the black lines along the edges of both plates which are actually 1.5 mm trenches filled with three slender, flexible lengths of pear wood, the purpose of which is to protect the violin from cracking later in life).
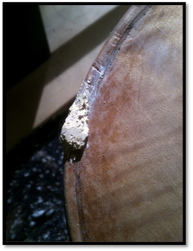
To fill these gaps for cosmetic reasons, we used an artificial wood called Rock Hard which is a powder mixed with water, making a substance somewhat like spackling, but drying much harder. A glob of Rock Hard was placed in the area of the missing wood and allowed to dry overnight. Then that glob was gradually shaped over several days, eventually blending into the shape of the real wood. These artificial wood areas dried white in color and therefore needed to be painted a darker color before the first stain was applied.
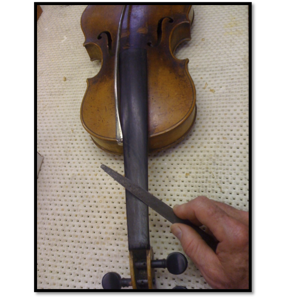
A violin’s finger board is made of an extremely dense wood called ebony so that it can withstand the constant pressures of the fingertips pressing against the wood. But even with ebony, after that many years of being played, the strings begin to create indentions in the wood which must be removed during restoration. This is slow, careful work with a wood fine file using a rocking, rounded motion and always pressing evenly.
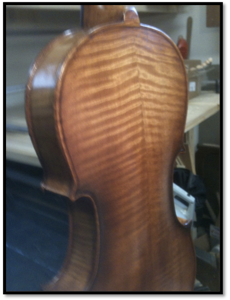
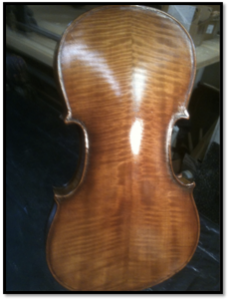
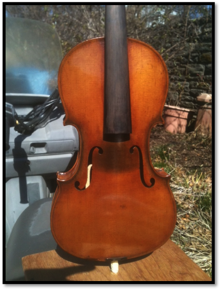
Now we were ready for the staining process, and the first part of that process is applying a sealant coat. When Gus was being built, the apparently luthier did not use an undercoat of sealant, applying the stain directly to the wood. This permanently blackened certain areas of Gus between the fingerboard and the bridge and on the edges of the C bouts (the C shaped areas in the middle of the violin on either side of the bridge). Even after the first coat of stain, as you can clearly see, that black area is still visible. In the color staining coats to come, no color was added to these already dark areas and double color was added the lighter areas beside them, helping the two to blend in.
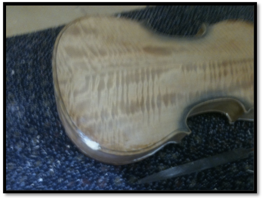
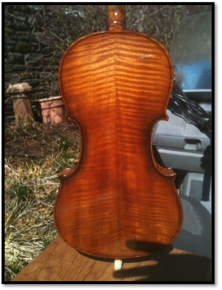
Therefore we put a sealant coat down first, allowed it to dry overnight, and only after that beginning the series of color stainings, each one progressively darker, but never so much so that the beauty of the wood grain and flame (the tiger skin looking horizontal lines on the maple back plate) were not clearly visible and natural looking.
When I built Rebecca, we put on only one coat of color staining, followed by a heavier varnish. Granted, it is very beautiful, but varnish is known to somewhat diminish the vibration capacity of the wood.
At Harold’s suggestion and to some degree as an experiment, we decided Gus would first have multiple color stainings, each one bringing out more of the richness of the wood. One of the traditional goals of a good violin restoration is to make the instrument look and feel old (a process called antiquing).
Some of the great old master violins such as those of Stradavari were originally varnished as Rebecca had been, but others were not varnished, but given a process referred to as French polishing, a simply rubbing on of a color and oil mixture, dried and repeated until the preferred amount of gloss results. Thinner than actual varnish, the process of using polish results in richer sounds from the violin. All varnish eventually wears off of old instruments, but when that happens, Strads are never re-varnished. They are always French polished instead, to protect their sound. If it is good enough for a Strad, we decided, it is good enough for Gus!
When the color and oil were ready, we used a tight circular wad of cheese cloth, bound together with a strong rubber band, as an applicator (the term actually used in luthier books for this homemade applicator is “French rubber”), pouring a small amount of the liquid color and two drops of oil on it for each rub. Then the mixture is quickly rubbed over the entire back plate, using all circular movements and never stopping the motion on the wood, which would cause unevenness. At the end of each motion, the hand should keep going into the air to guard against accidental jerkiness.
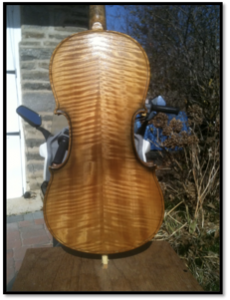
I rubbed in the first layer of French polishing, immediately followed by a second layer, then left it to dry overnight. It is interesting that the sealant coat and all separate color staining coats need to dry outside in the sun, and therefore the work needs to be accomplished first thing in the morning to make use of the most sun. French polishing coats, on the other hand, because they are thinner, dry right there on the work table overnight. The next morning, I took a small piece of the finest steel wool and gently rubbed over all the newly French polished areas to remove any minute nubs of polish. The area must be completely smooth before applying a second French polish coat. At this point the gloss is already beautiful.

Tomorrow morning I return to steel wool once again and then add a third and final layer of French polish. Returning the next day, the “birthing day”, the strings, pegs, tail piece, button, and chin rest are set-up for playing and the sound post reinserted under the bridge directly under the E (highest pitch) string. Then we tune Gus up and get set to hear the sound for which we have waited for over three months.
At that point on the birthing day, Harold and I will take turns playing Gus for each other, discussing candidly the richness, sensitivity, and consistency of each string. Then comes the “Harold magic”, the part of the process I cannot explain. First Harold takes a specialized, curved 6 inch tool with a flat, paw-like end and sticks it through the F hole on the high string side, gently tapping the sound post to minutely adjust its positioning. Then he takes a delicate, slender carving knife and carves out a tiny strip from the center of the bridge itself. This is all artistic instinct from 40 years of luthier experience. He then has me play again, listening acutely for changes in the sound. We continue this mystical process over and over, gradually uniforming and enrichening the sound until Harold sits back and smiles, finally satisfied. May I say that this man is a genius, besides being Gus’ personal mid-wife!
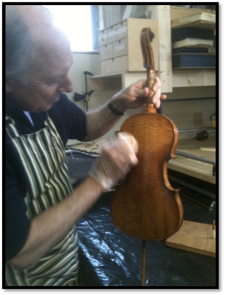
So wherever you are on Thursday morning, March 8 at about 11:00 am, raise your coffee cups to celebrate Gus’ completed resurrection. I’ll be bringing him around to all rehearsals and family gatherings for you to see and hear for yourself!
